
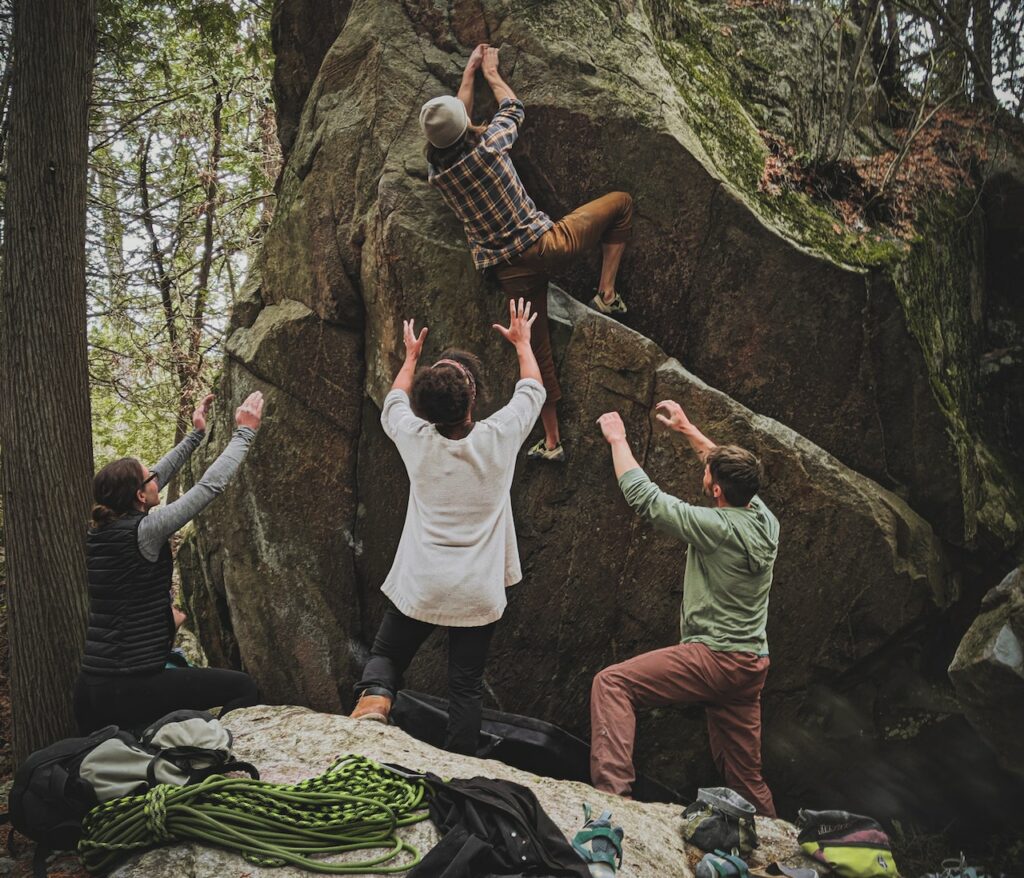
Outdoor bouldering is an excellent way to start your rock climbing journey. Not that it’s a child’s game, but because it requires far less equipment. So you’re free to concentrate on climbing, not the equipment.
Assuming you have the basics of bouldering after trying it in a gym or a similar setting, let’s get into today’s topic: crash pads / bouldering pads. FYI – these names are used interchangeably.
Why are bouldering pads so important? Are they expensive?
Crash pads are likely the most important part of your bouldering kit, even more than your shoes.
While you could climb a boulder with regular sports shoes (though it’d be difficult), you should NEVER boulder without crash pads. People in the ‘80s used to do that, and I can tell you it wasn’t pleasant. Crash pads are the only thing ensuring you get to climb another day.
Bouldering pads are moderately expensive. You can get a small one for $50 to $100, while a standard crash pad will easily cost $150 – $200. High-quality crash pads start above $200 and go as high as $400-$500.
Which is the best bouldering pad to buy in 2022?
Metolius Magnum is the best bouldering pad in 2022, and it comes at a hefty price of $400. Its large size and triple fold make it suitable for frequent boulderers. At just over $230, Black Diamond Impact is the best bouldering pad for beginners.
I personally recommend going with comparatively cheaper options like Black Diamond for beginners, even if you have the money for a Metolius. As a beginner, you’re bound to make mistakes in maintenance, storage, and handling, which can cause wear and tear faster.
Let’s look at some of the best bouldering mats / crash pads that money can buy in 2022. Remember, a good bouldering pad isn’t always suitable for all requirements. I’ll explain in a minute or two. Be sure to read the section on choosing a pad before you make a decision.
1. Metolius Magnum – Editor’s Pick
Metolius Magnum is one of the few trifold crash pads. It’s well-made, durable, and an absolute monster in terms of its size. You can get this 70in by 47in crash pad for under $400.
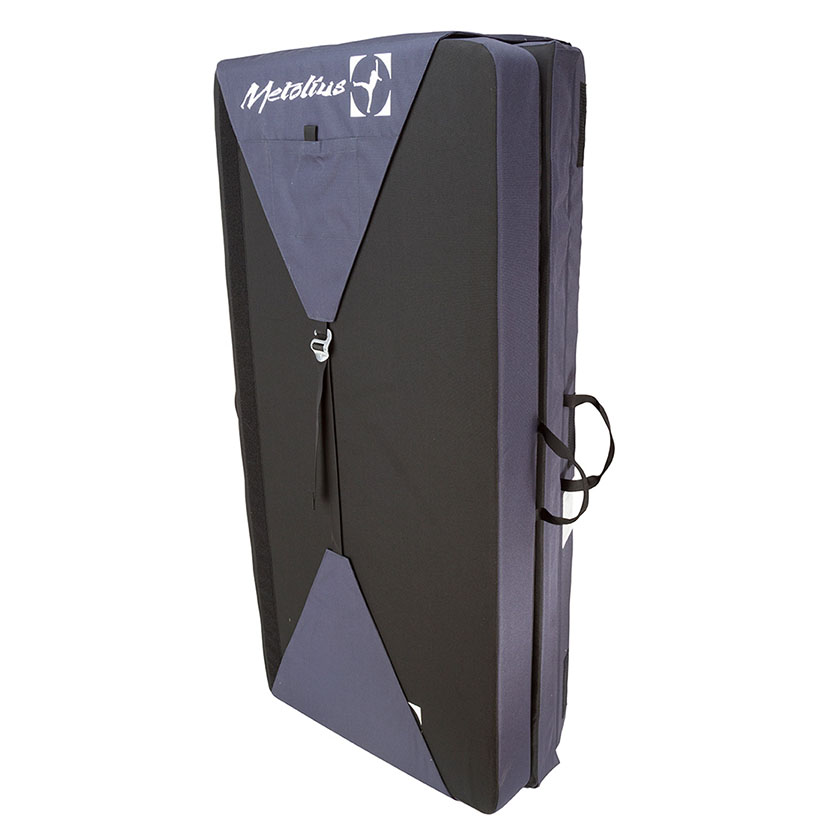
Sounds expensive, but you’ll undoubtedly get your dollar’s worth. Metolius Magnum has a triple-layer foam, yet it’s pretty narrow when folded. You can fall from great heights without worrying and store it easily in a standard-sized car.
Magnum is only 4” thick compared to other high-ball pads that are at least 5”, but trust me, you won’t feel the difference. Metolius’ Magnum is without a doubt the best crash pad money can buy for frequent boulderers and professionals.
Buy Metolius Magnum Crash Pad on:
At under $329, Mad Rock Triple Mad Pad is another strong contender and likely the second-best trifold crash pad in 2022. It’s worth considering if you’re on a tighter budget.
Buy Mad Rock Triple Mad Pad on Amazon
2. Mad Rock Duo – Editor’s Pick
At just $300, Mad Rock Duo is the best bifold crash pad in 2022. It’s also the best crash pad overall since trifold pads aren’t as standard. Mad Rock’s Duo is ergonomically designed to balance its weight on your back with a model strapping system and folding mechanism.
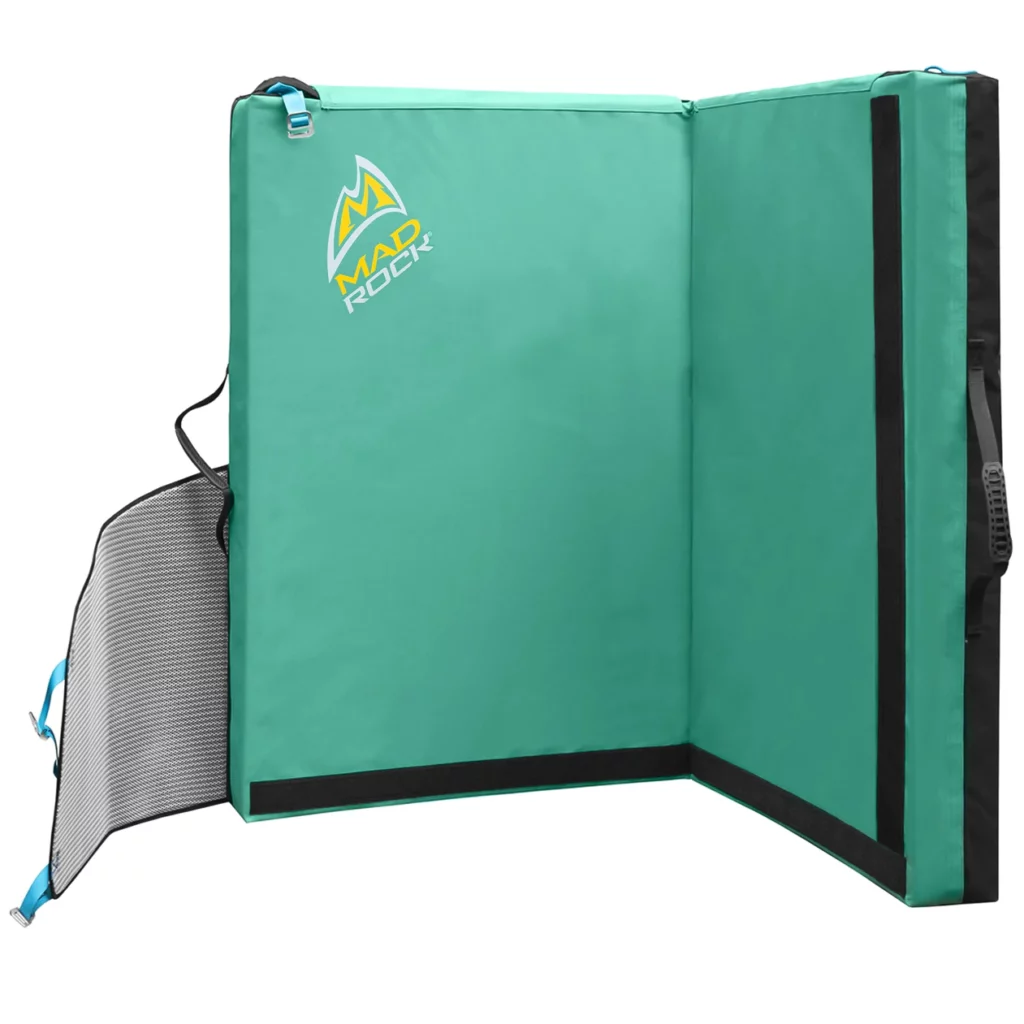
Its close-cell sturdy foam is considered better than Metolius Magnum for high falls. Mad Rock Duo also attaches to a second crash pad using straps, which further increases the landing zone.
Mad Rock Duo makes a great second crash pad after you’ve practiced on a beginner pad.
Buy Mad Rock Duo Crash Pad on:
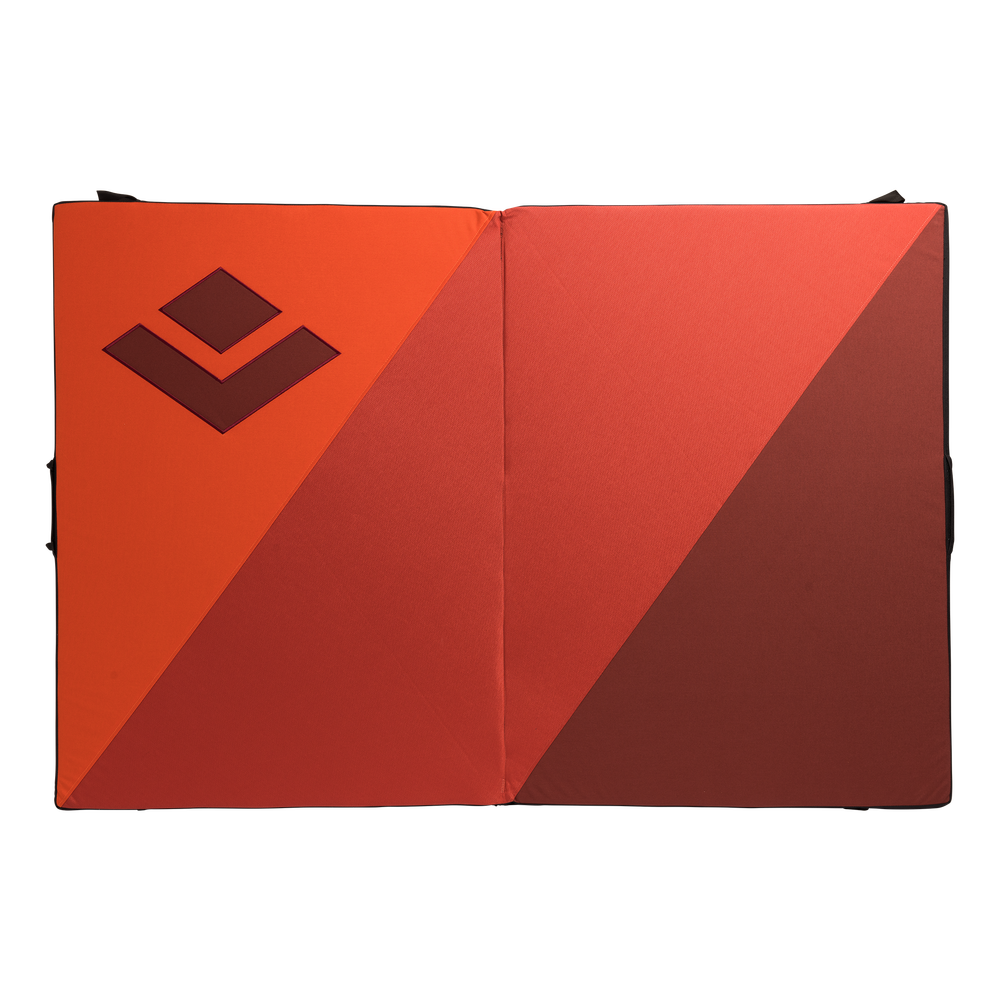
3. Black Diamond Equipment Impact – Editor’s Pick
Black Diamond Impact is the best crash pad for beginners and intermediate-level boulderers at $230 – as long as you’re under a certain height.
The Impact’s area (36in by 24in) is larger than other popular beginner-friendly crash pads like the Metolius Session II and Mad Rock Mad Pad. The unit comes with an updated suspension making it easier to haul, and a hinge-style fold with velcro.
The foam isn’t rigid per se, but it’s stiff enough to absorb an impact from a moderately high fall. This is great for beginners.
Buy Black Diamond Equipment Impact Crash Pad on:
4. Petzl Alto
Petzl Alto is the best taco-fold style crash pad anyone can buy in 2022. It has a zip-up flap closure system that makes storing your stuff inside the Alto much safer than other taco-style folds.
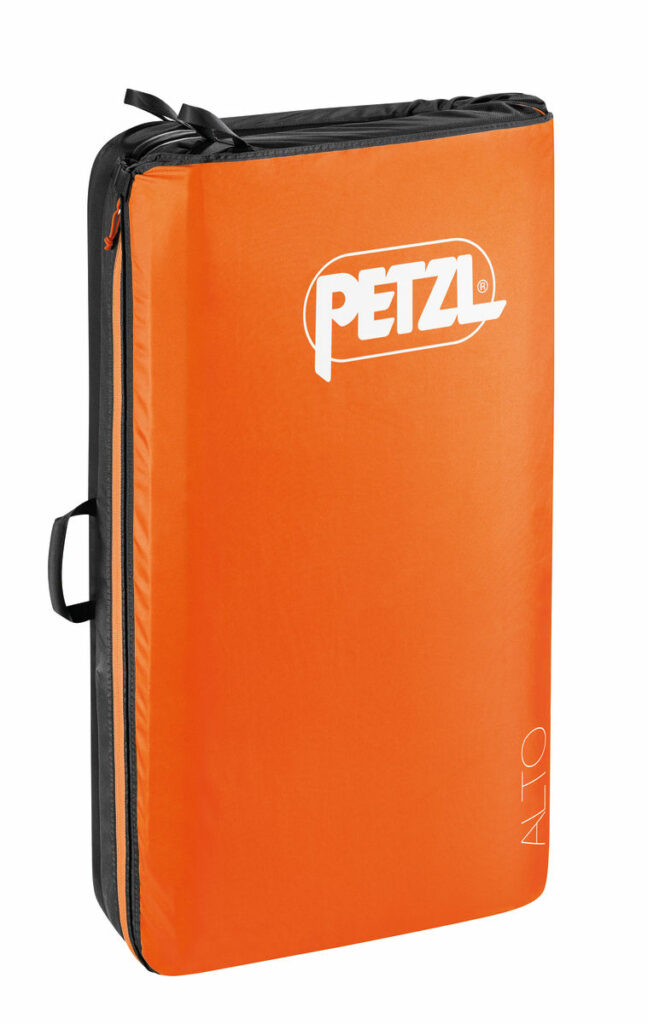
Unfortunately, that’s how far the pros go. Petzl Alto is undoubtedly the best taco-fold crash pad if you want one, but it’s inferior to the other bouldering pads on this list.
Buy Petzl Alto Crash Pad on:
5. Mad Rock R3
The design of Mad Rock’s R3 crash pad is intriguing. Mad Rock R3 has a unique folding mechanism that can store a bunch of stuff, and it’s the best pad for covering uneven rocky surfaces.
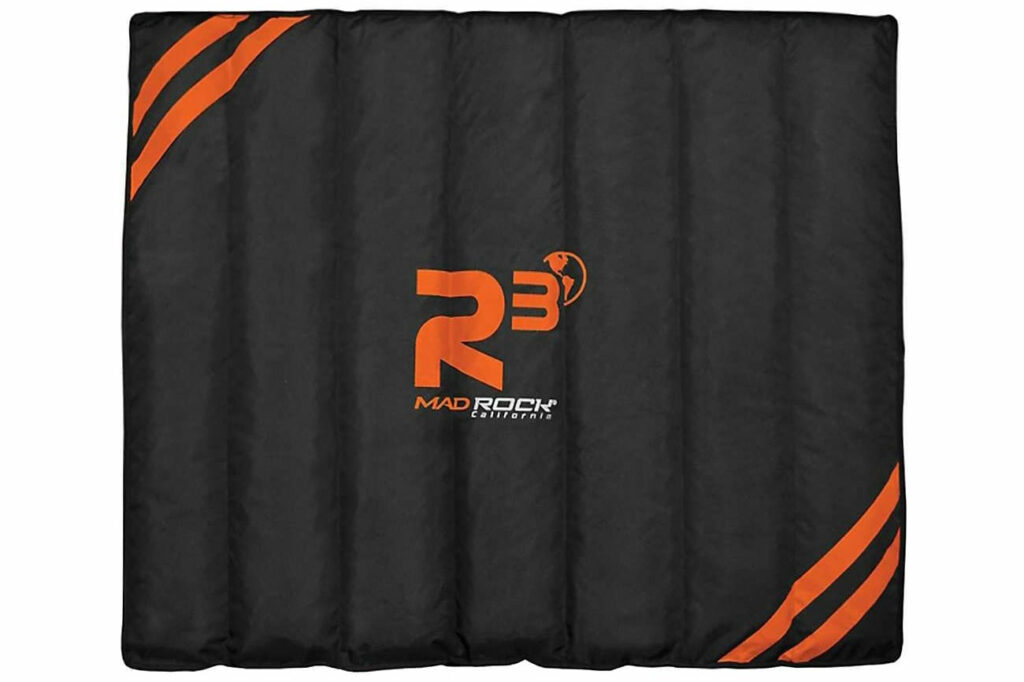
The R3 is only about 4 inches thick, but at 18 pounds, it’s on the heavier side. While R3 is excellent for angles and gaps, especially on uneven terrain, I don’t recommend using it as the central crash pad for long falls.
Additionally, Mad Rock uses recycled EVA foam for R3’s baffles. It’s estimated that about 15lbs of EVA foam are recycled/reused for every Mad Rock R3 purchase – a win all around.
Buy Mad Rock R3 Crash Pad on:
6. Black Diamond Mondo Crash Pad
Black Diamond Equipment’s Mondo Crash Pad is a mega-size design for high falls, along with premium foam and super durable fabric. With a size of 65in by 44in by 5in, Mondo is the best large crash pad in 2022.
Trust me, you’ll feel how big it is when you’re hauling a giant 20-pound mattress worth $430. While I don’t recommend it for beginners, it’s certainly great for large groups and professionals, thanks to the water-resistant coating on the highly durable 600-denier polyester fabric.
Buy Black Diamond Mondo Crash Pad on:
How do I choose a bouldering pad?
Bouldering pads are mostly made of thick foam with several different layers and levels of hardness on top and bottom, all enclosed in a protective covering. Most are foldable and come with straps so you can move around quickly.
1. Choose the right fabric to protect everything.
The quality of your crash pad fabric should be perfect because the outermost layer undergoes a lot of stress. It’s either folded or dragged around for placement on uneven surfaces and sharp rocks.
Toughened nylon (1000 or 1680) and Cordura are both widely used fabric materials. Get the one that suits your requirement. I recommend spending a little extra to get a good quality fabric, maybe even a rubberized outer fabric to increase durability and prevent slipping.
Crash pads from some named brands, like Evolv Maverick, have reinforced bottoms and edges to increase durability.
2. Balance between open-cell and closed-cell foam.
There are two types of foam: open-cell and closed-cell. A good quality crash pad has both. The ideal setup is a thick layer of open-cell foam sitting beneath a thin layer of closed-cell foam. The stiffer closed-cell foam provides a softer catch by sending the impact into the softer open-cell foam.
Don’t buy a crash pad that is soft and cushiony with a lot of open-cell foam. They’re bad at absorbing impact, and you’ll get hurt during a fall. Crash pads should be hard and stiff to protect your ankles and back.
The foam quality is another factor where I recommend spending a bit more. High-quality foams are almost always expensive, but they last much longer and are more durable.
Cheaper pads usually add chemicals to the foam. They work as intended for some time, but the foam develops cracks and breaks down in a year or two.
3. Choose the right folding mechanism for the crash pad.
The standard crash pads are bifold. That is, you can fold them from the middle, wrap them up and carry them to wherever you want. Like the Metolius Magnum, some are trifold and quite huge (in a good way).
The bottom line is that whichever crash pad you buy, there will be a crease (or gap), and boy, it’s a problem and a half. A good folding mechanism utilizes the fold as efficiently as possible because falling on the gap causes instant injury.
I’ve sprained my ankles enough times to isolate a good folding crash pad from bad ones. There are three types – hinged, taco, and hybrid.
Hinged crash pads are the most common. They have a hinge on the connecting end to fold the pad. Unfortunately, a flat hinge (straight hinge) can cause a wide enough gap for a possible injury.
Some companies try creative solutions like an angled hinge (slanted hinge) because it allows the overlap to reduce most of the gap. It’s not a perfect solution, but it’s considerably better than a flat hinge.
The second option is what we call a taco – a continuous crash pad that’s thick and can be folded like a taco. The only problem is that it’s harder to move around with and must always be stored open and flat otherwise, the foam will be destroyed faster.
Finally, you have the hybrid fold, which takes the best of both worlds – it’s a flat hinge without a hinge. You basically have a continuous dense layer of closed-cell foam that folds two pieces of thick open-cell foam. This way, even if you fall on the hinge, you are supported by relatively thicker closed-cell foam.
Verdict: I don’t recommend getting a flat hinge unless you have a quality crash pad. Velcros are inefficient in most cases, especially on rocky, uneven terrain. Go with a taco or a hybrid to maintain it properly. Or you can find innovative solutions like the angled hinge.
4. Choose a suitable size and thickness, not the standard.
Thickness is pretty straightforward when it comes to crash pads. A thicker pad equals added impact resistance and more weight. The standard size is 3 to 4 inches, but experts recommend staying above the 3.5-inch line. Your pad should be as thick as you can possibly carry and fit in your car.
Ps…if you like bouldering at more-than-standard heights, thickness is critical.
In comparison, choosing the size of your crash pad is competitive, to say the least. A bigger pad will cover a bigger surface area, but it’ll be just as hard to carry around. If you travel in public transport, getting two relatively small pads is better than one big crash pad.
Size also matters because a rectangular crash pad is usually better than a square crash pad. Another setup is to get a big crash pad (rectangular or square) and a small rectangular crash pad. These small crash pads can cover leftover spaces and angles.
Also, check for thickness when choosing size. Smaller crash pads are thinner, so they should be used in conjunction with a big thick bouldering pad.
5. An efficient strapping system goes a long way.
A strapping system may seem inconsequential at first, but it’s essential for practical purposes. The folding mechanism can only get the pad in your car, but you’ll have to haul it around the bouldering sites on your back. This requires an efficient strapping system for that.
A big crash pad with inadequate straps won’t stay on properly and will be harder to carry around. Some companies offer detachable strapping systems so they can be stored during bouldering. Otherwise, it would just get dirty lying on the ground.
Always get a crash pad with a chest strap to spread the weight evenly.
6. Make a budget and stick to it.
Ideally, you should make a budget and stick to it, but it’s nearly impossible for beginners to make a realistic one. I recommend checking out some good crash pads, their features, and price tags to understand your requirements and associated costs before making a budget.
You’ll have to make some compromises, but it’s easier when you know what you want.
7. Think carefully before falling for the “extra features.”
There are going to be dozens of extra features – a scrap pad for cleaning your shoes, a pocket for your valuables, a cover for your straps so they don’t get dirty, and so on.
As a beginner, you should focus on getting the essentials right. The extra features can wait.
Crash Pad Alternatives for Outdoor Bouldering: Yay or Nay?
Crash pad alternatives are risky. Most everyone is unanimous on this one. You MIGHT be able to use these alternate solutions a couple of (highly questionable) times, but it will eventually lead to a minor or major accident.
I can’t say you will get hurt on your first few tries. Still, it’ll happen as you progress and take on harder bouldering problems. I know I can’t convince all of you because let’s face it, these alternatives are much cheaper, here are the three most popular alternatives (and why they fail when they fail).
1. Can you use a new or old mattress as a crash pad?
Using old mattresses is the most common alternative to bouldering mats, followed by purchasing new mattresses for the same purpose. Technically, you can do that, but it would eventually hurt your knees, back, and ankles.
First, any mattress, old or new, is unsuitable for bouldering because they’re supposed to be soft and cushiony. And as I explained earlier, your bouldering pads should be hard and stiff. Second, you’ll spend more money in the long run since wear and tear causes mattresses to become unusable much faster than pads.
Third, mattresses aren’t compatible with moving around because they’re unfoldable. Using mattresses as a crash pad alternative only makes sense when you’re an absolute beginner (still not recommending it) or setting up small climbing routes in the kids’ room.
2. Can you use a baby mattress as a crash pad?
NO. A baby mattress is a poor bouldering pad alternative. They’re softer than adult mattresses, so even a short 5-foot fall would hurt.
3. Is making a DIY crash pad safe? How to make one?
It sounds far-fetched but making your own DIY bouldering crash pad is possible and safe – much more than the last two alternatives.
There are two common problems with DIY crash pads:
- the sewing quality isn’t durable, allowing the pad to fall apart
- the random “cushiony” stuff shoved inside isn’t fixed, so everything shifts around with usage.
Let’s solve both problems now.
So, how to make a good-quality no-sew DIY crash pad? By using a duvet cover. A zipper-sealed duvet cover is more durable than a fabric sewn to itself. Just open the zipper and shove all the cushiony stuff like body pillows inside. Close the zipper, and voila, you’re done!
This works fine for shorter heights, but it’s nowhere near a proper crash pad in terms of quality. It’s also immovable, non-foldable, and requires high maintenance.
Verdict for Crash Pad Alternatives
Bottom line, crash pad prices correlate to their longevity. If you look at all the alternatives, purchasing crash pads makes more sense because you’ll end up paying extra for these alternatives in the longer run.
Other Related Questions
1. Can you sleep on a bouldering crash pad?
Technically, you can sleep on your crash pad, but you shouldn’t. Bouldering mats are designed to be harder for safer landings but aren’t suitable for your back/spine. Buying a relatively softer crash pad is better for sleeping but disastrous for bouldering.
Some climbers prefer sleeping on crash pads, especially big ones like the Metolius Magnum or Tripe. But even if you can withstand the hardness, sleeping on crash pads accelerates the wear and tear, softening your pads.
I recommend using crash pads for bouldering only and getting a sleeping pad.
2. How many crash pads do I need for bouldering?
Travel with multiple crash pads during your bouldering trips for safety reasons. More than one crash pad is essential as you grow and climb higher on rocky and uneven terrain. Beginners should start with one big crash pad.
Then keep adding to your kit. Next is one or two small crash pads to cover the leftover angles. Of course, the best advice is to boulder in a group – “invest in one crash pad and two other bouldering-mates with one crash pad each.” It’s the perfect combo, after all.
3. How to set up crash pads properly?
Setting up your crash pads properly is the most important part of your safety routine before bouldering. A relatively lower quality pad placed correctly is better than a higher quality one placed wrong.
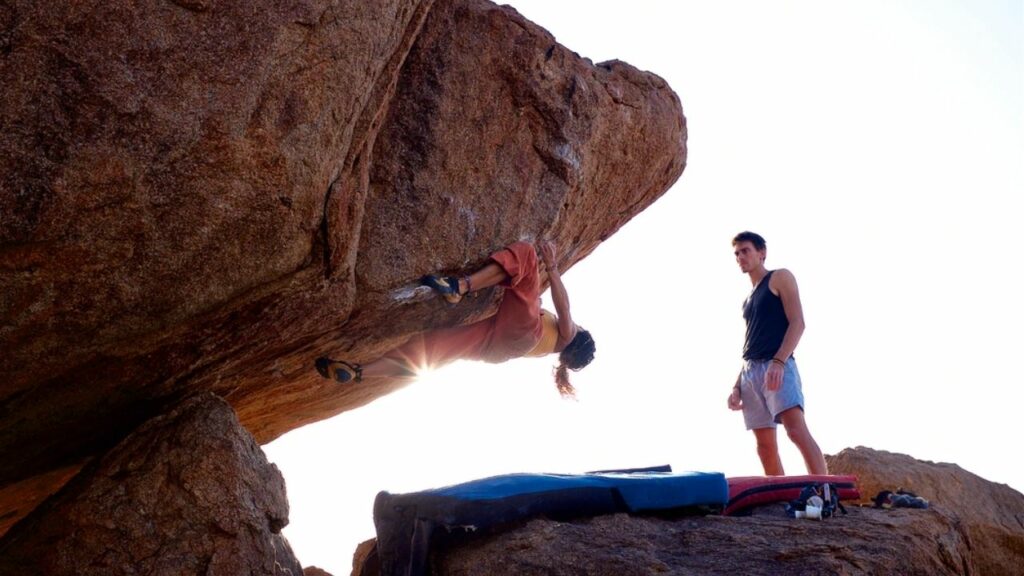
Step 1: Identify the fall zones. We usually put crash pads right at the foot of the boulder, but that’s not always the right call. When you’re traversing a steeper boulder (with or without an overhang), your spotter should be moving the crash pad to where you’d like to fall once you’re safely away from the first point.
Step 2: Make an efficient landing zone for maximum impact absorption. Use small pads to support the big crash pad (either directly or indirectly). This creates an even landing zone. Then, cover as many gaps as possible by playing the “crash pad Tetris.”
Step 3: As you climb higher, start stacking crash pads on top of each other with the help of your spotter. This will increase the thickness and absorb the impact. Although it’ll reduce the total landing area unless you have a bunch of extra pads. So, make sure you identify the fall zone as accurately as possible.
Basically, don’t overdo it, and have fun!