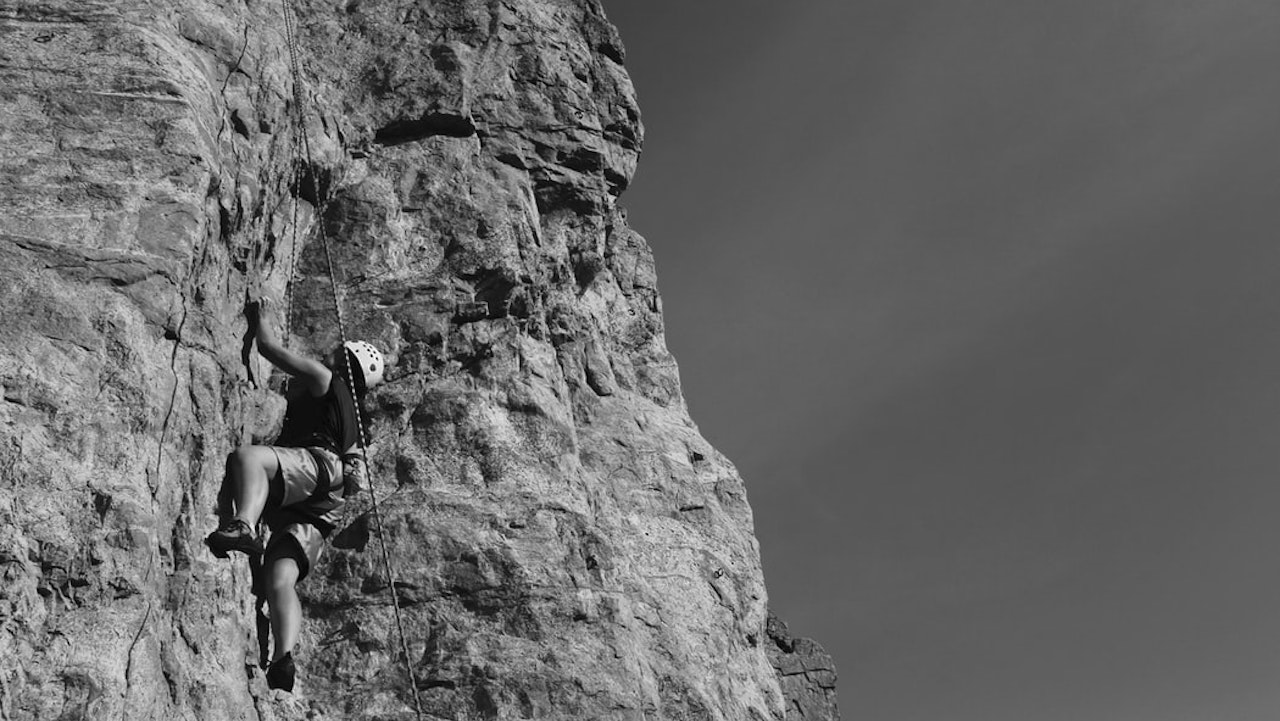
A Prusik knot is a friction hitch used to grip a rope in climbing, canyoneering, mountaineering, caving, rope rescue, ziplining, and by arborists. They’re designed to move freely on a line as you climb.
The Prusik knot is easy to tie on the go, so it’s an obvious go-to climbing knot for professional climbers and enthusiasts. In fact, it’s one of the most popular “slide-and-grip knots,” not because it works the best but because it’s easy to make.
What is the purpose of the Prusik knot?
The Prusik knot is used to attach a loop of thin cord, called “Prusik slings,” to a climbing rope. It’s bidirectional, so you can move the Prusik knot forward or backward along the rope line with ease, when under the right force or friction.
Though they’re the most commonly used friction knot for ascending a rope, Prusik knots may be better suited as rappel backups. That’s because a Prusik knot can be difficult to slide up and down when under intense force or friction from loading (with you, a bag, another person, etc.).
For ascending a rope, a dedicated ascender device or a more sophisticated knot such as the Prohaska or Fritz Bachmann variants are recommended in the Great Outdoors Stack Exchange. However, you can use two Prusiks to ascend or descend a fixed rope or standing line by using the lower knot as a foot loop and controlling the top one with your hands.
In rappelling, the Prusik hitch (or triple sliding hitch) acts as a kind of autoblock knot to hold a climber in place during an emergency or anytime when both hands are needed. It’s a slide-and-grip knot because it slides easily when not weighted or loaded, but it grips tightly when pulled to hold a load.
The Prusik is the name for the friction hitch itself as well as the loops of cord used to tie the hitch. You can also use Pruisk as a verb: “to Pruisk” means to attach a loop of cord around a rope using the Pruisk knot.
Prusik vs. Klemheist Knots
The Prusik knot and Klemheist knot are two friction hitch knots that essentially do the same job: to grip a rope in an autoblock system.
Both knots excel at simplicity in design and ease of tying but have some drawbacks compared to more elaborate friction hitches.
| Prusik knot (misspelled as Prussik knot) | Similarities | Klemheist knot (uni-directional Machard) |
| Best used with cords, not slings. Bidirectional: works in either direction. Easier to self-inspect: all the strands are neatly positioned parallel to each other, making inspection relatively straightforward. Easy to tie and untie. Very secure when loaded. Difficult to dress well. Tightens up, so it’s difficult to release and slide up the rope. | Both are types of friction hitch knots. Both knots (as well as the Bachmann) can be used to build an autoblock knot for rappelling (downward) and ascending (upward). They block well but are hard to loosen up after loading, so they’re better suited as rappelling knots and belay backups. | Can be used with cords and slings Uni-directional: only works in one direction. Harder to inspect: the loop must be on top and short so the wrappings below get squeezed when loaded. During inspection, you must simulate a load while still secured. Tied around a thicker rope. Locks when loaded but can slide while unloaded. |
Let’s take a closer look at the importance of the Prusik knot working in either direction versus the Klemheist, which works in one direction. This directional distinction is important in the following situations:
- Traversing using an old, fixed rope rigged horizontally: you could attach a Prusik to it from your harness. If the rope were to break either to the left or right of you, the Prusik would save you. But if you were using a Klemheist, you would only be safe falling in one direction or the other.
- Bailing off a route and you only want to leave one bail biner or piece of pro: the Prusik knot would save you if the top piece of trad gear or protection gear (aka: “pro”) were to blow. The Klemheist knot, on the other hand, might work. But you could easily rig it wrong by accident. It’d need to be rigged the opposite way than you’d do for ascending a rope or a rappel backup.
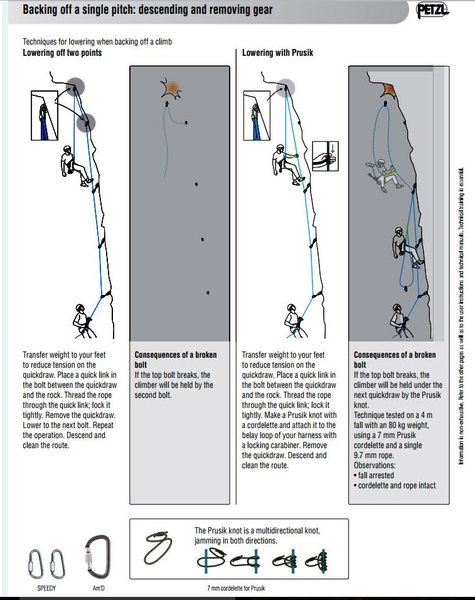
The right half of the image below illustrates how you’d lower or descend with a Prusik knot when backing off a climb:
What size cord should I use for a Prusik?
Use a cord that is 5’ long and 2” to tie a Prusik loop. As a rule of thumb, the length of the accessory cord tied in a Prusik loop should be twice the length of the finished loop with one extra foot for knots. An 18″ Prusik loop will require 4′ of cord.
Rescue and belay authorities recommend using a cord or other Prusik loop material that is about 60% to 80% of the standing line diameter. So a cord that is 8mm thick is needed for 1/2″ rope and 7mm cord for 7/16″ ropes. Other lifelong climbers advise using a thin 5mm or 6mm cord for the loop of the knot.
In any case, the cord used to tie a Prusik knot needs to be the right size and material to create enough tension to secure the weight of the climber and the rest of the load. The relationship between the Prusik cord size and the diameter of the standing line/climbing rope determines the holding power of the knot.
For the Prusik knot to grip, the Prusik loop must have a smaller diameter than the rope. If the cord diameter is too small, the knot/hitch will be too tight to move the loop easily. If it’s too large, the hitch won’t be tight enough to firmly grip the rope and could slip.
Be sure to test the cord and rope before going climbing. You want to make sure you’re using cord and rope combinations that’ll work reliably when you need it.
How long should a Prusik knot be?
A finished Prusik loop of knot is typically 18 inches to 3 feet long. The exact length depends on what it’s used for but the loop must be at least 15.7” (40cm) in length to ensure there’s enough space to create the Prusik hitch around the climbing rope.
Some climbers prefer using 24-inch Prusik loops, which require a 5-foot long cord (1.5m). Longer loops may be required for alternative uses.
You can also carry both a 24-inch loop and a 48-inch loop. Clip the short one to your harness belay loop and use the longer one as a foot sling. You can make shorter loops longer when climbing by attaching another sling to them.
How many loops does a Prusik have?
Prusiks typically have three loops. Without a third loop, it can be difficult for climbers to pass a knot in the rope.
The number of loops though really depends on the diameters of the rope and the loop of the knot. In fact, a Prusik knot can be formed with as few as two wraps or loops to as many as five.
But a three-wrap Prusik knot (i.e. two tandem triple-wrap Prusik) is standard.
Knowing how to create these Prusik loops isn’t just necessary to tie a Prusik knot. It’s also used to tie Autoblock, Bachman Hitch, and Klemheist knots.
How strong is a Prusik knot?
The amount of weight that a Prusik knot can handle really depends on the knot and rope configuration. Estimates of prusik strength though are about 3,127 lbs depending on the configuration.
A few extra hundred pounds of weight shouldn’t make a huge difference. If it does, then re-rig your knot into a configuration in which such a small difference doesn’t make or break the rigging.
How to tie a Prusik knot?
Tying a Prusik knot essentially entails wrapping a loop a few times around a standing line and then tightening the knot.
Here’s a short video from REI on how it’s done:
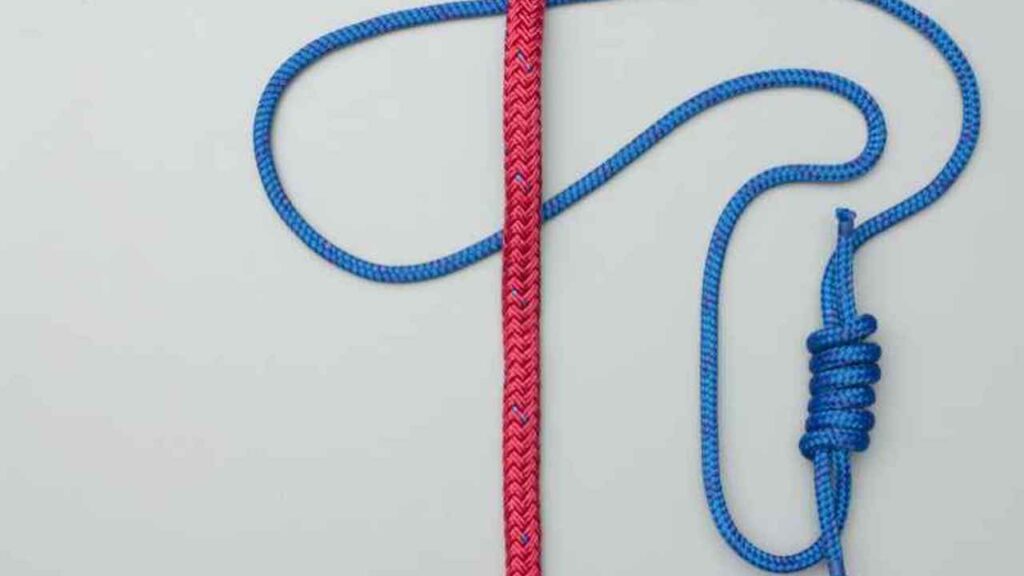
- Tie the rope together to form a loop of cord.
- Lay the ends of your rope parallel and pointing away from one another.
- Create a double fisherman’s knot or double figure-eight fisherman’s knot by coiling one end of the rope twice around the rope lying next to it. An X formation should be on one side and two diagonal lines on the other. Pass the free end back through the coils under the X.
- Repeat this process to create a Prusik knot on the other end of the rope.
- Pull the long sides of the rope next to the knots so the loops come together. You should now see two X’s next to each other with four diagonal lines on the back.
- Set up a Prusik hitch around the standing line.
- Put the loop of the knot behind the line you’re attaching to.
- Pull the knot through the loop.
- Wrap inwardly (i.e. on the inside of the loop) three times and pull through tightly. You should now have a line running through your double fisherman’s knot.
When you’re done, the Prusik hitch should look like three lines, the pulled-through loop, and three more lines. The back should look like six vertical lines running in parallel with a long horizontal line on top.
You can see the full step-by-step process with pictures on wikiHow.
Pro Tips to Rememer
- Attach a carabiner to your rope (not the knot itself) to attach to your harness. If needed, adjust the rope’s positioning slightly so that the double fisherman’s barrel knot isn’t directly in the center of your loop.
- The Prusik knot, as well as any other friction hitch, shouldn’t be used on icy ropes because the knot won’t be able to grip the rope.
- Never trust a single Prusik knot to securely tie yourself to a climbing rope for ascending.
Who invented the Prusik knot?
The Prusik knot was invented by Dr. Karl Prusik, an Austrian mountaineer, in 1931. It was originally described in an Austrian mountaineering manual as an ascending knot.
Prusik was the former two-time president of his mountaineering club, the Austrian Alpine Club (AAC), and the pioneer of over 70 new mountain climbing routes and ascents in Austria.
The Prusik knot became famous after “Vertical Bill” Cuddington started using it in 1952 to explore pits.
Takeaways – Getting Started with a Pruisk Knot
Here are some of the main advantages and disadvantages of the Pruisk knot:
Pros: easy to tie and untie, very secure when it’s loaded, bidirectional, easy to self inspect, and blocks well in an autoblock rope climbing system.
Cons: difficult to loosen after load compared to other slide-and-grip knots because it tightens up so good for rappel backups; best used with cords not slings; prusik loop must have a smaller diameter than the climbing rope.
Once you’ve tied and attached your Prusik knot to the climbing rope, you can start ascending by simply slide the knot up. When the knot is loaded with your weight and the rest of your carrying load, the friction constricts and grabs the line so you can ascend.
But don’t trust your life on just one Prusik knot! Be sure to test your cord and rope before climbing to make sure you’re set!