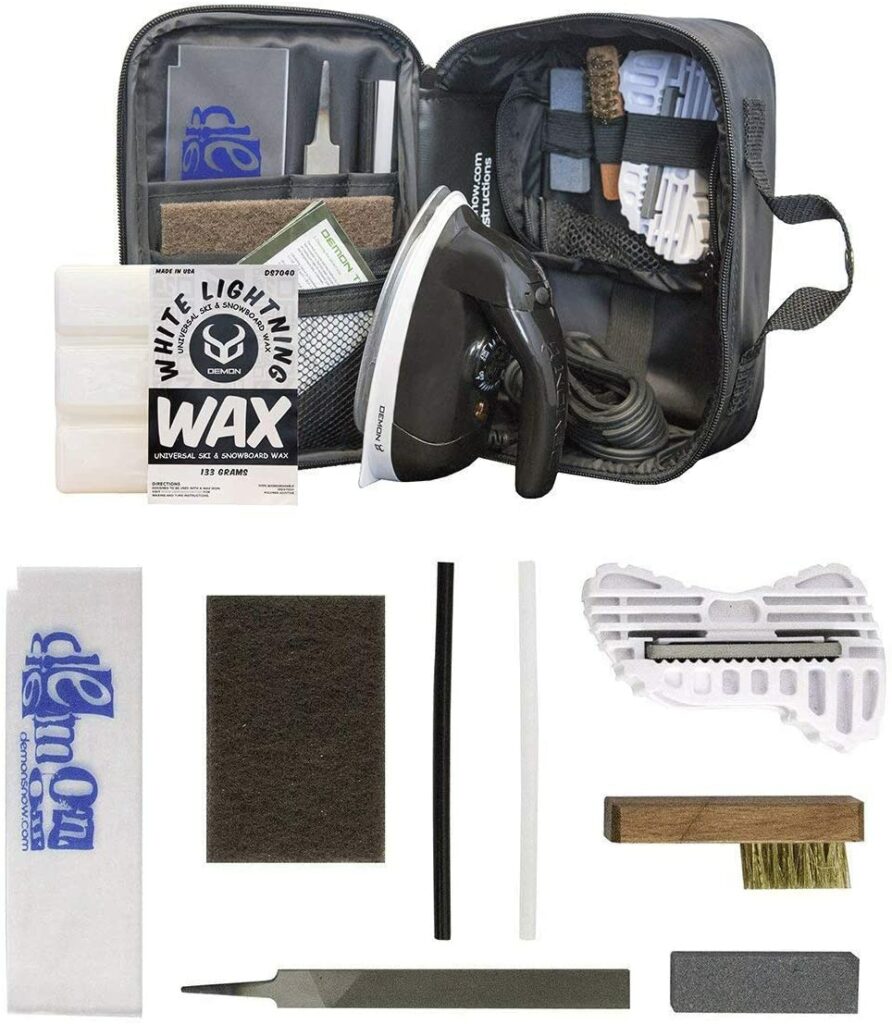
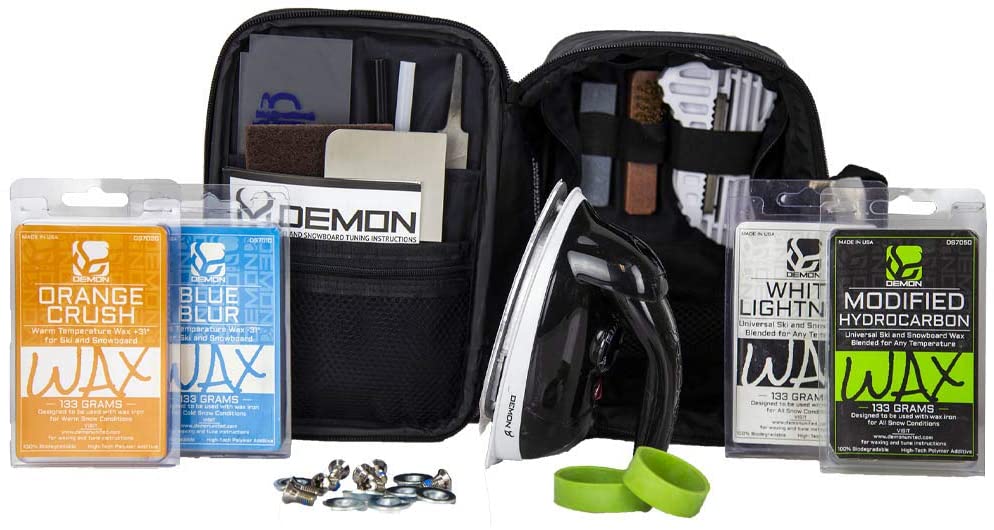
Just the other day, we discussed the importance of waxing and tuning your snowboard (and skis) for a smoother boarding experience.
In that guide, I talked about the correct method of snowboard waxing. And to my surprise, some of you emailed me and asked about assembling your own DIY waxing kit at home or “how should I replace some stuff in my old kit?”
So, here are the things I look out for when assembling my own snowboard waxing kit. You can use this advice when you need to replace anything instead of having to buy a whole new kit altogether.
Can I wax my snowboard myself? Is it worth the effort?
In case you missed the first guide, let’s catch up quickly. You can skip to #2 (What to look for in a snowboard waxing kit?) if you know the importance already.
Everyone (even beginners) can and should wax their snowboards themselves. It’s a simple task that doesn’t require much effort. More importantly, you’ll be saving $30 – $40 every time your snowboard needs waxing and tuning if you do it yourself instead of asking the shop.
In short, yes, it’s 100% worth the effort (provided you get to put any in the first place).
1. How often should I hot wax my snowboard?
Ideally, you should hot wax your snowboard every 3-4 rides to keep it in pristine condition for a longer time. It also depends on the frequency of your snowboarding – the cooldown period for waxing will decrease if you snowboard more frequently.
2. What happens if I don’t wax my snowboard?
Failing to hot wax your snowboard will result in faster degradation of the product and overall snowboarding experience. You won’t notice the issues immediately, but your snowboard’s edges and base will start getting drier, thereby producing more friction and, hence, less speed.
What to look for in a snowboard waxing kit?
You need to acquire six primary products to assemble your DIY waxing kit at home. You would need a snowboard-compatible wax and cleaning solution, an iron, a scraper and structuring brush, a cloth for cleaning, and finally, a bag to put all this in.

1. Wax & Cleaner ($30 – $40)
Be careful to only buy your snowboard wax from known brands. This is because the wax will be in direct contact with the base of your snowboard, and inadequate wax products might end up doing more harm than good.
While people do advocate for using a block of paraffin, I wouldn’t recommend it. Don’t get confused with the word paraffin and use candle wax because those two are slightly different. More importantly, candlewax will undoubtedly wreck the base of your board.
You would also need a base cleaner to remove the existing wax and gunk but don’t get a degreaser that you would use on bike chains.
Purchase Recommendation:
- Demon Hyper X Universal 1lb Wax + Citrus Base Cleaner
- DEMON UNITED All Season Ski & Snowboard Speed Wax Kit (OPTIONAL)
2. Iron ($35 – $40)
You don’t necessarily need to buy a snowboard (and ski) waxing iron if you already have an old standard iron lying at home. The catch is that it can get wax all over, and you won’t be able to use that same iron on your clothes. Or, you can save a few bucks and buy a second-hand standard iron.
The only difference between normal iron and snowboard waxing irons is that the latter doesn’t have holes at the bottom because you don’t need to generate steam for waxing snowboards.
If you’re using the former, just use aluminum foil to seal the hole, so the melted wax doesn’t drip inside the machine.
Purchase Recommendation:
3. Scraper ($7.49 – $13.28)
Two types of scrapers are generally used in snowboard waxing kits – plastic and acrylic scrapers. As for the thickness, 4mm is the industry standard.
You can buy whichever one you can get for a cheaper price provided they’re from a reputable company.
Purchase Recommendation:
- Mt Sun Gear Heavy Duty Acrylic Wax Scraper
- XCMAN Snowboard Base Wax Plastic Scraper
- Swix Wax Scraper Snowboard
4. Structuring brush ($5 – $6)
There are three types of structuring brushes that are primarily used for tuning and hot waxing a snowboard. The three choices differ in their brush hair materials – nylon, horsehair, and brass.
You can go with any of the three choices because they’re basically equally good.
Purchase Recommendation:

5. Cloth ($0.53 – $0.87)
You can buy any microfiber or ordinary cloth for this.
Purchase Recommendation:
6. Kit Bag ($5 – $10)
You only need to look for two factors when buying a kit bag for your DIY wax kit. The first is the price-to-performance ratio. You simply need to find the right balance between price and durability, and you’re good to go.
The second factor is the size of the bag. Get the smallest bag with enough space to fit the five primary items with little room to spare if you’re planning on traveling with the kit.
Should you make a snowboard kit yourself or just buy one?
Those six items mentioned above — wax and cleaner, iron, scraper, structuring brush, cloth, and kit bag — are literally the only things you’ll ever need for hot waxing your snowboard, unless your board (or you) has a specific requirement.
Yes, many snowboarding kits come with added features, but that extra stuff isn’t necessary. Although you can get a regular snowboard waxing kit (without wax iron) instead of making one yourself, provided you get the same quality at a lower price.
What can I use instead of snowboard wax?
You wouldn’t want to melt paraffin for your snowboard since it isn’t good for the environment. Below are types of waxes you CAN and CANNOT use to wax your board.
1. Can you use any wax to wax a snowboard?
Unfortunately, you cannot simply use any wax for hot waxing a snowboard because real snowboard wax is designed specifically for its purpose. Even though they’re made of paraffin, other paraffin wax alternatives are equally bad choices for your snowboard.
2. Snowboard Wax Alternatives
There are three major snowboard wax alternatives that you could buy for your waxing kit. And the best part is that all three of these are environment friendly – explicitly engineered to perform equally well without the environmental downsides of melting paraffin.

A. Phantom Permanent Waxless Glide
Phantom’s Permanent Waxless Glide is an excellent alternative to paraffin wax, but saving the environment comes at a steeper price (about $100).
Good thing is, it’s a one-time, wax-less treatment, which means the coating will probably never come off your base once it’s dried. It’s literally a permanent solution to your problem.
Phantom achieves this level of precision and quality thanks to its “sophisticated, timed polymerization process” that permanently penetrates the entire thickness of the base.
B. Faststik Revolutionary Ski Wax Alternative
Faststik’s Revolutionary Ski Wax Alternative is seriously as good as it sounds. It was made to be used at all temperatures – from sub-zero to nearly melting snow.
It’s made of a microfilm polymer blend and costs about $40 for the piece. Just like Phantom, it’s a glide, so you wouldn’t need a scraper or iron to use this product. It’s also highly durable and comes in a small, lightweight roll-on box.
C. Look No Wax
Look No Wax is what started the charge for environment-friendly wax alternatives, but I wouldn’t recommend buying it against the other two choices because of that.
The spray is made of “non-poisonous” chemicals so it won’t harm the environment, but it’s an older technology, and you can get better options at a similar price point.
I recommend buying Phantom’s Permanent Waxless Glide because, well, it’s permanent.
3. Are alternate snowboard wax equally good?
Snowboard Wax alternatives are actually better than the standard paraffin snowboard wax. They don’t need a hot iron or even a scraper and are much more durable than the latter. On top of that, glide wax alternatives like PHANTOM and FastStik are biodegradable (environment-friendly).
Here’s a pro tip: applying excessive wax is just as bad as applying none at all. It dries the base much more quickly and attracts gunk (dust and unwanted particles). So, remove all the extra wax with the scraper and structuring brush.
Good luck, and feel free to send me a message if you have any questions.

